
Rainbow Six Siege Mute Guide:
How To Play MUTE in 2023
Mute is not the flashiest operator available in the Rainbow Six Siege, but when used correctly he can play a significant role in winning rounds on the defensive end.
With a diverse skill set, Mute fulfills two crucial roles on defense:
- Anti-Intel:
Mute’s Signal Disruptor can neutralize drones that trespass within its effective radius, impeding the enemy team’s ability to gather vital information. - Breach Denial:
By strategically placing Signal Disruptors, Mute can render reinforced walls impervious to Hard breach devices, effectively thwarting any attempts to breach and enter fortified areas.
Mastering Mute’s abilities and employing them tactically will not only frustrate and hinder the attackers but also contribute significantly to securing victorious rounds for your team!
PROS:
- Mute offers a high degree of utility flexibility.
- He possesses a versatile loadout with multiple options.
- Has access to a Nitro Cell providing plant denial capability.
CONS:
- Mute’s Signal Disruptors disable rather than destroy attacking utility.
- As a 3-armor operator, Mute has slower mobility, making him vulnerable to ambushes.
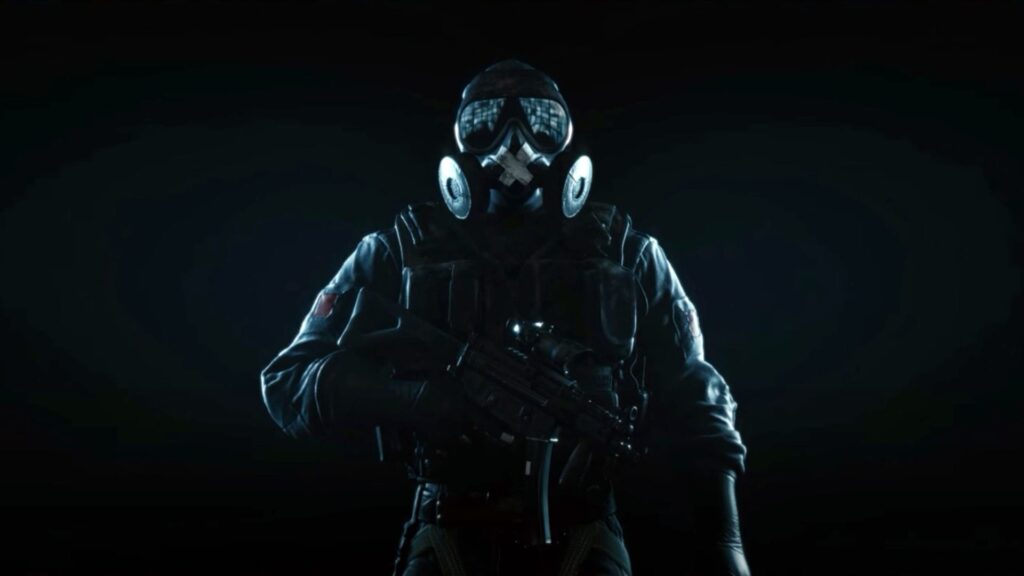
OPERATOR GUIDE – MUTE
TABLE OF CONTENT
Mute Utility Guide
What is the ability of Mute?
Mute is equipped with 4 Signal Disruptors that interfere with attackers’ electronic devices within an effective range of 2.25 meters. These jammers can be placed on flat horizontal surfaces like floors, boxes, or tables, and remain active until destroyed or picked up by Mute.
BREACH DENIAL
Mute’s Signal Disruptors excel at preventing Hard Breachers from creating openings in walls or hatches. The disruptor’s range allows one jammer to impact two regular-sized reinforced walls, three smaller walls, or a specific hatch location.
ANTI-INTEL
Mute is the go-to defensive operator for countering enemy intelligence gathering. By disabling drones within the jammer’s range, Mute effectively hinders attackers’ ability to gather information, making him a crucial Anti-Intel asset.
BREACH DENIAL DEFENDERS
Different defenders excel in Breach Denial and Anti-Intel roles depending on the situation. As a general guideline:
- For wall breach denial, choose Bandit or Kaid.
- For hatch denial, opt for Kaid.
- For drone denial, select Mute.
However, this list doesn’t imply that Mute cannot jam reinforced walls effectively. It simply highlights the operators’ specific capabilities in certain situations based on the nature of their utility.
LIMITATIONS OF BREACH DENIAL
Compared to Bandit and Kaid, Mute has the least impact on breaching scenarios due to the non-destruction of attackers’ utility affected by his jammers. While Bandit and Kaid can destroy impacted devices like Exothermic charges, Mute only disables the detonation possibility as long as the jammer is active.
PREVENTION OF REMOTE GADGETS
In addition to breaching denial and drone disruption, Mute’s gadget also prevents the effects of remotely activated electronic gadgets such as Lion’s EE-ONE-D or Dokkaebi’s Logic Bomb. Defenders positioned within the jammer’s range are unaffected by these attacker utilities, providing valuable protection against these powerful tools.
How to use Mute’s utility?
Using Mute’s utility is straightforward in terms of gameplay mechanics: simply place the Signal Disruptors on the floor without any time limit for their duration. Mute can also see the effective range while deploying the devices, which helps determine suitable placements.
However, the effective usage of Mute’s utility begins with understanding where and why you should position them.
The optimal use of Mute’s utility depends on two main factors: team composition and the objective site.
Team Composition
Consider the team composition and the potential presence of Bandit or Kaid. Different defenders excel in Breach Denial and Anti-Intel roles depending on the situation.
As a general rule of thumb:
- If you have Bandit or Kaid for wall breach denial, focus on Anti-Intel as Mute.
- If your defensive team only has Mute, prioritize blocking significant reinforced walls from being breached. Use spare jammers for Anti-Intel purposes.
- In cases where your team has a strategically placed Mira window, support it by putting a jammer nearby to counter Shock drones.
Objective Site
The objective site itself plays a role in determining how to use Mute’s jammers. Some sites have reinforced walls that hold greater importance than others. As Mute, prioritize blocking reinforced walls that lead outside of the building, as it gives your team a significant advantage over attackers. An example is Chalet’s Snowmobile Garage.
Other sites may not require Mute to focus on Breach Denial. For objectives like Bathroom/Tellers defense on Border, concentrate on the Anti-Intel role, preventing attackers from gathering information about the defenders’ presence.
Placing Jammers Strategically
Lastly, it’s important to place the jammers in hard-to-reach locations to keep them safe and obscure the line of sight. Surfaces do not obstruct the jamming power of the disruptors, meaning they can still interfere with devices even without a direct line of sight.
This is a significant advantage for Mute. Whenever possible, position the devices behind cover within the area you want to disrupt. Breaking the line of sight makes it challenging for attackers to gain vision on your Signal Disruptors.
Synergies with other operators:
In Rainbow Six Siege Mute can effectively synergize with several defensive operators:
- Mira:
Mute’s jammers serve as an excellent counter to Twitch & Brava drones, which are a direct threat to Mira’s Mirrors. The disruption range of the jammers helps protect Mira’s vital intel-gathering tools. - Castle:
Mute’s disruptors can benefit Castle when placed near his reinforced barricades. By preventing the detonation of electric utility on the panels, Mute hinders attackers’ attempts to breach through Castle’s reinforced structures. It’s important to note that ranged breaching devices like Ash’s Breaching rounds are not affected by the disruptors! - Bandit:
Mute’s utility can play a crucial role in protecting Bandit’s gadgets from enemies’ drones. This synergy is particularly useful for “Bandit tricking” when a reinforced wall is adjacent to a drone hole. Mute’s jammers disable the drones, preventing them from disabling Bandit’s electrical devices. - Mozzie:
Mute’s disruption of drones makes it easier for Mozzie to capture and take control of them. - Deployable shields:
Well-placed deployable shields can enhance the effectiveness of Mute’s disruptors. The shield acts as a barrier, obstructing the line of sight on the jammer and providing additional protection to the gadget.
By capitalizing on these synergies with other defensive operators, Mute can strengthen the defensive strategies and increase the overall effectiveness of the team in countering the attackers’ advances.
Countered by Mute:
Mute effectively counters the following attacking operators in Rainbow Six Siege:
- Hard-Breachers – Thermite, Hibana, and Ace:
Mute’s jammers jam the breachers’ utility, rendering it unusable. However, Thermite can retrieve his Exothermic Charge, while Hibana must wait for the jammer to be destroyed before deploying her gadgets. - Breaching charge:
Attackers can place breaching charges, but they are unable to detonate them due to the disruptive effect of Mute’s jammers. - Fuze:
Fuze can deploy his cluster charges, but he cannot activate them unless the jammer is removed or destroyed. - Twitch, Flores, and Brava drones:
When within range of Mute’s jammer, these attacking drones are disabled, preventing them from performing their intended functions. - Default drones:
Mute’s jammers also disable the functionality of standard attacking drones when they enter the range of disruption. - Lion:
Defenders positioned within the range of Mute’s jammer can freely move during the duration of Lion’s EE-ONE-D ability without revealing their positions. - Dokkaebi:
Defenders within the jammer’s range at the time of Logic Bomb detonation will not have their phones ring, granting them additional stealth. - Iana:
Similar to drones, Mute’s Signal Disruptors disable the functionality of Iana’s hologram when it enters their range.
Additionally, Mute has the capability to disrupt the usage of utility for specific operators in certain situations:
- Blitz:
If within range of Mute’s jammer, Blitz is unable to use his flash ability effectively. - Jackal:
Mute’s disruption interferes with Jackal’s Eyenox vision, impairing its effectiveness similar to drones.
It’s important to note that these 2 last scenarios are highly situational, and their impact on the outcome of the round is generally considered insignificant. Nonetheless, Mute’s disruptive abilities can provide valuable advantages in countering the abilities and tools of these attacking operators.
Counters to Mute:
Mute’s Signal Disruptors can be effectively countered by various offensive utility in Rainbow Six Siege:
- Thatcher:
Thatcher is the most potent counter to Mute. His EMP grenades can disable the disruptors without requiring a direct line of sight, as long as they are within the range of the EMP effect. - Twitch, Flores, and Brava:
Drones operated by these attacking operators can either destroy Mute’s disruptors or take control of them, rendering them ineffective against their intended purpose. - IQ:
IQ can detect Mute’s jammers using her electronic detector and shoot them through penetrable surfaces, neutralizing their effect. - Ash:
Mute’s jammers do not affect Ash’s breaching rounds. The rounds can destroy the disruptors upon impact, allowing for breach attempts. - Zofia:
Zofia’s Lifeline gadget is not affected by Mute’s disruptors and can shatter the jammers upon impact, eliminating their interference. - Kali:
Kali’s LV Lance gadget is immune to Mute’s disruptors and can destroy the jammers if they are placed within its effective range. - Zero:
Zero’s Argus cameras can destroy Mute’s jammers with their electrical zap, effectively eliminating their disruptive capabilities.
In addition, there are counters to Mute’s Signal Disruptors from the perspective of secondary gadgets:
- Frag Grenades:
Operators such as Dokkaebi, Glaz, or Sledge can utilize frag grenades to destroy Mute’s jammers, eliminating their effect. - Impact EMP:
Operators equipped with impact EMP grenades can disrupt Mute’s Signal Disruptors in a manner similar to Thatcher’s EMP grenades, providing an alternative means of countering them.
These counters present offensive options for attackers to overcome Mute’s utility and regain control over their electronic devices and gadgets. Being aware of these counters is essential for effective coordination and adaptability during gameplay.
Mute Playstyle Guide
Playstyle role of Mute
Anchor
An anchor in Rainbow Six Siege is a defender who primarily remains on the objective site to defend it or maintain line of sight on the objective room throughout the round. The key objective of an anchor is to delay the attackers’ push towards the objective site while prioritizing their own survival.
Anchoring involves adopting a more static playstyle, where the defender holds specific angles and positions for the majority of the round, aiming to repel the enemy’s advance.
Anchor Perfect Loadout
Mute is exceptionally well-equipped for anchoring duties. With access to a shotgun and the versatile SMG-11 as a secondary weapon, he offers a combination of utility and flexibility. The adjustments made by the developers to Mute’s armor and speed ratings further emphasize his suitability for anchoring.
3-ARMOR
Being a 3-armor operator, Mute possesses increased resistance to damage. This resilience can prove crucial in successfully defending the objective site and preventing it from being overrun by attackers.
Additionally, as a 1-speed operator, Mute’s slower movement speed and louder footsteps make it harder for him to execute flanking maneuvers and return to the objective site quickly.
Roles Are fluid
In Rainbow Six Siege, roles are not strictly exclusive to specific operators. While a three-speed operator can occasionally fulfill the role of an anchor, and a 1-speed operator may attempt a flank, they are generally better suited to their designated roles. Each operator’s unique design and abilities make them more proficient in certain playstyles and strategies.
If you wish to delve deeper into the art of anchoring, we recommend visiting the dedicated section on this role for a more comprehensive understanding. Simply click the button below to access the additional information.
Difficulty of Mute – Easy to pick up; Hard to master
Mute presents a blend of ease and challenge, making him accessible for beginners while offering depth for mastery.
- Mute is mechanically straightforward:
Utilizing Mute’s disruptors is a simple task as players only need to place them on the floor. This user-friendly mechanic allows even new players to Rainbow Six Siege to quickly grasp Mute’s basic functionality. - Effective usage demands map knowledge:
However, to make the most of Mute’s abilities, players must possess a fundamental understanding of the game’s maps. Knowing where to strategically position the jammers becomes essential for optimal utility. - Mastering the shotgun + SMG-11 combo:
In the Rainbow Six Siege community, it is widely accepted to equip Mute with a shotgun and the SMG-11 as a secondary weapon whenever possible. However, utilizing this loadout effectively requires practice, particularly in managing the recoil of the SMG-11. Additionally, relying on this combination may limit Mute’s capabilities in mid to long-range engagements.
Mute’s accessibility makes him a suitable choice for newcomers, but unlocking his full potential requires a deeper understanding of maps and honing the skills necessary for his preferred loadout. With time and practice, players can elevate their proficiency with Mute to new heights.

Mute Loadout Guide
available loadout for Mute
| Primary Weapons | MP5K | M590A1 | – |
| Secondary Weapons | SMG-11 | P226 | – |
| Universal Gadgets | Nitro Cell | Bulletproof Camera | – |
suggested loadout for Mute
| Primary Weapon | Barrel | Grip | Sight |
|---|---|---|---|
| M590A1 | – | – | Reflex A |
| Secondary Weapon | Barrel | Grip | Sight |
|---|---|---|---|
| SMG-11 | Flash Hider | Vertical Grip | Reflex A |
| Universal Gadget |
|---|
| Nitro Cell |
Why such loadout for Mute?
RECOMMENDED SETUP EXPLANATION
The loadout with the SMG-11 as a secondary weapon offers versatility, but it heavily relies on the player’s proficiency with this firearm. The SMG-11 excels in short-range encounters but becomes more challenging to control at longer distances. It requires disciplined crosshair placement to avoid unnecessary spray. If you’re not comfortable using the SMG-11 for medium-range engagements, opting for the MP5K as a primary weapon may be a better choice until you become familiar with the SMG-11.
SHOTGUN + SMG-11
For players who can handle the SMG-11’s recoil, using the shotgun as a primary weapon is recommended. In higher ranks and the pro league, teams often prioritize “remodeling” objective sites by creating lines of sight between bomb sites. Mute’s loadout with a shotgun and SMG-11 proves invaluable for this purpose. Additionally, the M590A1 shotgun is highly reliable for eliminating enemies at close range. Equipping a laser sight on shotguns can tighten the spread and improve accuracy.
The SMG-11 is one of the few secondary automatic weapons available in Rainbow Six Siege. Its recoil is challenging to manage, so it’s advisable to utilize tap firing or short bursts to maximize its effectiveness. The flash hider attachment is ideal for reducing muzzle flash and controlling recoil. Considering the high vertical recoil of the SMG-11, using a vertical grip is a sensible choice. Currently, the SMG-11 only offers 1x sight options, with the Reflex sight being our preferred choice due to personal comfort and quick target acquisition.
MP5K SETUP
For those who prefer the MP5K as a primary weapon, equipping a compensator helps with controlling its horizontal recoil, which becomes more noticeable after the initial few bullets.
Similar to the SMG-11, using a vertical grip to mitigate recoil and selecting a preferred 1x sight are recommended.
UNIVERSAL GADGETS
When choosing universal gadgets, opting for the Nitro Cell is generally recommended unless your team has a specific plan involving a Bulletproof Camera.
While a camera can be a useful tool, it requires proper utilization to benefit defenders effectively. On the other hand, the Nitro Cell offers more independence from team coordination and tactics. It serves as an excellent counter to shield operators and can deny enemy plant attempts, making it our recommended choice for Mute.
More Content:
Rainbow Six Siege Operator Guide: How To Play Ace in 2023?
https://youtu.be/x32EyVrg8Jw Rainbow Six Siege Operator Guide:How To Play Ace in 2023? Ace is the 4th Hard breacher in the Rainbow Six Siege attacking roster.As a Hard breacher, he is capable…