Rainbow Six Siege Fenrir Guide:
How To Play Fenrir in 2023
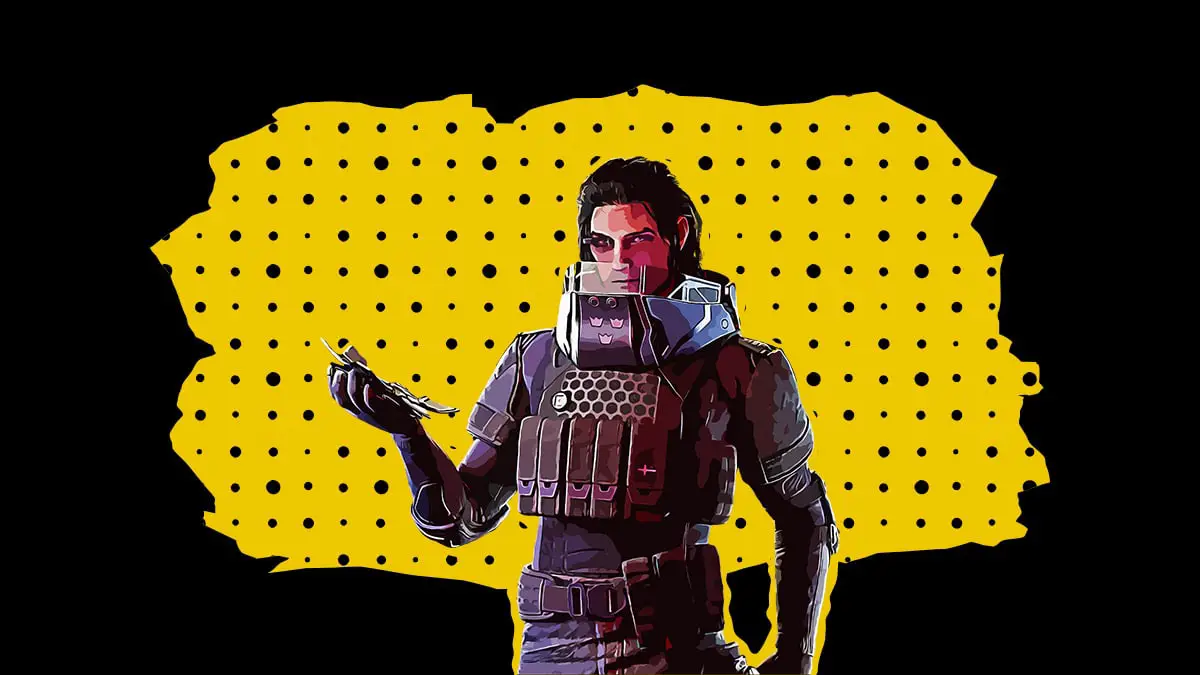
Fenrir stands out as a formidable defender in Rainbow Six Siege, bringing a mix of intel-gathering and debuff abilities to the table.
This makes him not only a valuable asset to his team, but also a frustrating challenge for opponents. So much so, that he frequently finds himself on the ban list in Siege matches.
And while you might think his trap-based intel alone would suffice, Fenrir goes the extra mile by impairing attackers’ sight.
As if that wasn’t enough, he also wields the reliable MP7, a gun that’s simply awesome in its own right.
PROS:
- Strong utility for intel and debuff
- Solid loadout kit
- Offers a high skill ceiling
CONS:
- No access to explosives
OPERATOR GUIDE – FENRIR
TABLE OF CONTENT
FENRIR Utility Guide
What is the ability of Fenrir?
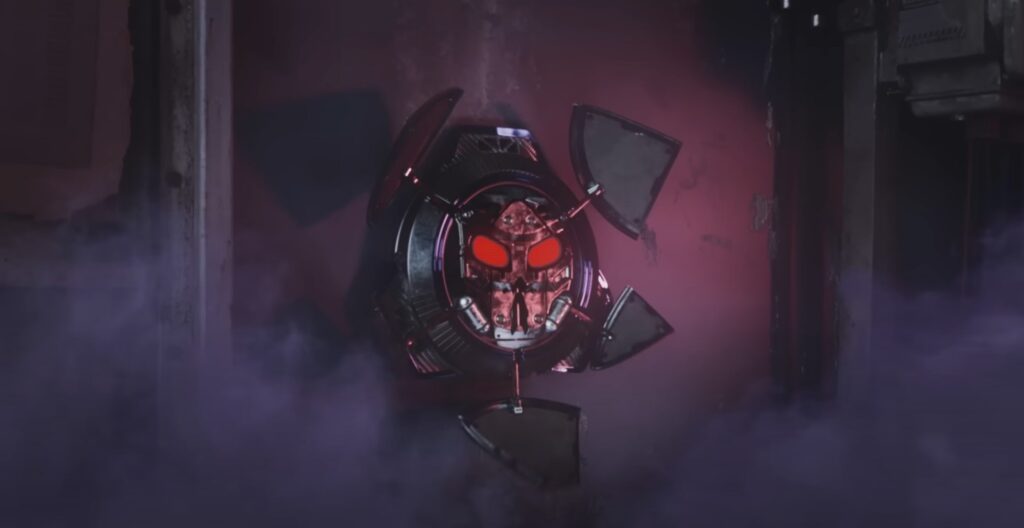
Let’s dive into Fenrir’s utility. Fenrir boasts a set of 5 traps called Dread Mines, deployable through tosses like Wamai’s magnets. These mines bring a dual impact: debuffing attackers and providing Fenrir with UI notifications when intruders come into range.
Of these 5 traps, 3 can be active at any given moment, remotely activated from any distance. Fenrir boasts some clever features.
He can control traps without direct line of sight, and their visibility remains on his UI regardless of distance or obstructions.
Interestingly, these traps can blind multiple enemies and are perpetually usable – activating each time foes cross into their radius. Keep in mind, direct line of sight is necessary for activation.
While dormant, these traps are bulletproof, requiring explosives or EMPs to dismantle. Once activated, they become vulnerable to gunfire. One caveat is that if a live trap is destroyed, Fenrir doesn’t regain it, and his cap on active traps persists. This underscores the importance of strategic trap placement.
So, what’s the essence of the Dread Mines?
Intel Gathering
They excel in two primary roles: intel gathering and debuffing.
Starting with intel gathering, defenders receive alerts in two ways upon trap activation.
First, an audible cue resonates, audible to any nearby defender. Second, Fenrir’s UI showcases active and triggered trap indicators, with the icon turning red.
Even if this was the extent of Fenrir’s utility, he’d already be a top pick, functioning as an improved version of a three-proximity alarm user. But there’s more to his arsenal.
Debuffing
When attackers cross into the mine’s range, a debuff takes effect. This debuff significantly impairs the sight range of those within the trap’s vicinity.
After a few seconds, intruders find themselves nearly blinded.
This forces attackers into a dilemma: retreat to tackle the trap or forge ahead, risking confrontation.
Area Denial
Skillfully positioned traps can even reroute attackers or deny access altogether if they lack explosives or EMPs. This introduces a potential third role for Fenrir’s Dread Mines: area denial.
When attackers lack the means to neutralize the traps and a defender is playing off them, a conundrum arises, often compelling attackers to rethink their path toward the objective.
In essence, Fenrir’s utility is a versatile force, offering intel, debuff, and area denial options that can reshape the course of a match.
How To Use Fenrir Effectively?
So, what truly defines a skilled Fenrir player? Let’s break down the key aspects that showcase your proficiency with this operator:
- Effective Trap Placement:
Skillful use of Fenrir’s traps hinges on clever positioning. The aim is to conceal mines from sight and make them challenging for attackers to disable.
Avoid placing traps in easily accessible spots for intruders. Instead, opt for locations around entryways, choke points, and common planting zones. This requires a keen understanding of how players tend to move, making map knowledge a crucial asset when employing Fenrir’s traps.
- Situational Awareness:
Being adept at Fenrir means staying attuned to the situation. Grasp the attackers’ movements and your teammates’ positions.
This knowledge guides your decisions on which traps to keep active and when to switch them up. Effective Fenrirs extend their support to teammates, not just themselves. Communication with your squad is vital, but you must also be vigilant about your surroundings. Some information you’ll need to deduce from the ongoing situation rather than relying solely on callouts.
- Skillful Trap Utilization:
Leverage your traps as tools to capitalize on gathered intel and the debuff they impose on adversaries.
A mark of excellence is seen in players who can execute actions like wallbangs based purely on trap-derived intel. Picture this scenario: you’ve positioned a trap near an entry point, and you’re situated behind a penetrable wall. The moment the UI notifies you of the trap’s activation, you shoot through the wall, catching the intruder off-guard. This mastery extends to objective plays where patience is key. Waiting for intel beats impulsive actions, particularly in the final moments of a round. Impatience can cost you dearly, while a calculated approach reaps rewards.
Optimal Trap Placement
Before we proceed, let’s delve into the intricacies of trap placement, a pivotal facet of Fenrir’s utility. Where you position your traps can make or break your effectiveness. Strive for a balance between concealment and impact:
- Level 1 Placement:
Position traps on the defensive side of doors, not just lying in plain sight to be easily shot. This basic placement is the foundation. - Level 2 Placement:
Elevate your traps above ground, at doorways, windows, or other entry points. This forces enemies to trigger the trap and divert their attention to shoot it, granting you an advantage in a firefight. However, this strategy can become predictable due to its popularity. - Highest Level Placement:
Employ environmental clutter to obscure your traps. Conceal them within shelves, cupboards, or debris. For instance, in Oregon’s master bedroom cupboard, you can hide a trap, making it difficult to spot and shoot. Similarly, on Chalet’s blue stairs, placing a mine in the ceiling debris is almost impossible to detect.
Striving for the highest level of placement isn’t always feasible across all objectives. Level 2 placement serves as a versatile alternative.
The key is unpredictability—consistently challenging enemies to take risks and divert their attention.
Fenrir’s Synergies with other operators:
Fenrir’s traps synergize seamlessly with other defensive utilities that impede attacker movement, such as:
- Barbed Wire
- Melusi’s Banshee
- Lesion’s Gu mines
- Clash’s electric zaps
These synergies slow down enemies navigating through the trap area, enhancing the overall impact of his traps.
C4 from Below:
Fenrir can also find synergy with defenders who wield C4 explosives. Similar to other intel-gathering tools, Fenrir’s traps can offer insights when a trap is triggered, aiding defenders in utilizing C4 from below to their advantage. However, this synergy tends to be situational and may not commonly be witnessed in practice.
Countered by Fenrir:
Now, let’s shift focus to those who can be countered by Fenrir’s Dread mines.
Unlike specifically targeting certain operators, Fenrir’s traps serve as a potent response to pushes onto locations safeguarded by his traps. This strategic utilization can be a game-changer in denying attackers access.
And as a result, Fenrir is especially useful at rushing groups or those underutilizing drones.
Counters to Fenrir:
While Fenrir’s traps can be formidable, they are not without their vulnerabilities. Attackers possess a wide range of tools to counter his traps:
- Explosives:
Attackers armed with frag grenades (i.e. Sledge) or unique utility like Ash and Zofia can obliterate Fenrir’s traps. - Drone Specialists:
Operators like Twitch, Brava, and Flores have drones capable of dismantling or taking control of Dread mines. - EMP Operators:
Attackers wielding EMP devices can temporarily disable Fenrir’s traps.For a comprehensive list of counters to Fenrir, consult our written guide’s dedicated section on interactions.

Fenrir Playstyle Guide
Playstyle role of Fenrir
Anchoring with purpose
Despite having a 2-speed 2-armor rating, Fenrir excels as an anchor, thanks to his utility that complements on-site play. While theoretically possible to place traps and roam, this approach can disadvantage teammates who lack the UI indicators for activated traps. Similarly, using Dread mines for roaming and setting ambushes is a theoretical option, but the current Rainbow Six Siege meta doesn’t often see Fenrir used in this way.
So, how should you approach playing with Fenrir?
It’s wise to deploy your traps early in the round, while holding onto one for unexpected developments.
When determining which traps to activate, assess both your teammates’ positions and your own. Factor in likely enemy routes. As the round unfolds, pay heed to cues like teammate callouts and drone activity. This will guide you on where to anticipate enemy pushes and which traps to prioritize.
For instance, imagine you’re stationed in Kafe Dostoyevski’s top floor objective.
If your teammates are near White stairs, activating the trap at the bar entrance from the White side might not be optimal. Instead, focus on activating traps at cigar, skylight, and the new balcony under the hatch. Position yourself strategically, await trap activations, and capitalize on gathered intel with precise prefiring. For instance, on the same objective, I position myself behind the reinforced wall in the cocktail bar, with a clear rotation to my right. I have traps set under skylight, at the new balcony entrance, and near the cigar entrance. Upon trap activation, I exploit the intel advantage, prefiring from rotations or doorways.
Remember, Fenrir’s downfall often arises from impatience. A willingness to wait and seize the right moments is pivotal.
If you’re interested in mastering the art of anchoring on defense in Rainbow Six Siege, explore the Anchoring guide below for further insights.
Difficulty of fenrir – Medium
When evaluating Fenrir’s difficulty level, it falls within the MEDIUM range. His dynamics present an accessible entry point, yet a higher skill ceiling invites advanced gameplay.
At first glance, Fenrir appears with a low skill floor. It’s relatively simple to select him and engage in the action.
Much like Ela’s devices, his traps can be placed and left to work.
However, his true brilliance emerges when adapting to the ebb and flow of each round.
Unleashing Fenrir’s full potential necessitates robust situational awareness, a deep grasp of map layouts, and keen game sense. These aspects aren’t instantaneously acquired, but rather cultivated over time through experience.
In a nutshell, Fenrir offers an achievable starting point, but attaining mastery requires dedication to refining your situational judgment, map comprehension, and overall tactical insight.

Fenrir Loadout Guide
available loadout for Fenrir
| Primary Weapons | MP7 | SASG-12 | – |
| Secondary Weapons | Bailiff 410 | 5.7 USG | – |
| Universal Gadgets | Barbed Wire | Bulletproof Camera |
suggested loadout for Fenrir
| Primary Weapon | Barrel | Grip | Sight |
|---|---|---|---|
| MP7 | Flash Hider | N/A | Holo A/B |
| Secondary Weapon | Barrel | Grip | Sight |
|---|---|---|---|
| Bailiff 410 | N/A | N/A | N/A |
| Universal Gadget |
|---|
| Barbed Wire |
Why such loadout for Fenrir?
PRIMARY WEAPONS
When it comes to Fenrir’s loadout, my clear favorite is the MP7. The shotgun, often dubbed “sausage,” has limitations in terms of viable engagements. The MP7, on the other hand, stands out as one of my personal top picks within the game.
I recommend attaching a flash hider, given the minimal horizontal recoil to begin with.
Notably, Fenrir lacks access to magnifying scopes, so opt for the 1.0 sight that suits you best.
I’ve recently taken a liking to both Holo A and B sights, finding them my go-to choices.
SECONDARY WEAPONS
As for the secondary weapon, the Bailiff makes an excellent pick.
This pocket shotgun grants you the ability to create new angles and open hatches. While it takes a bit more time for a proper rotation, it becomes a viable option if your team doesn’t possess suitable shotguns.
SECONDARY GADGETS
Regarding the universal gadget, the best choice is Barbed Wire.
As highlighted in the synergies section of this guide, barbed wire impeccably complements Fenrir’s traps. Slowing down attackers with wire amplifies the disorienting effect of the Dread mines.
It’s quite remarkable that Ubisoft granted Fenrir access to Barbed Wire, given the potent synergy it offers. To maximize its impact, position the barbed wire in tandem with your mines—place it at choke points or entryways near your traps.
I’d suggest considering Bulletproof camera only when your squad is well-equipped with ample barbed wires, and you’re part of a coordinated pre-made group. This ensures effective coordination with your teammates on barbed wire placement.
In conclusion, selecting Fenrir’s loadout thoughtfully can significantly enhance your effectiveness on the field, aligning with his utility and the strategic role he plays in Rainbow Six Siege.
More Content:

Rainbow Six Siege Operator Guide: How To Play Ace in 2023?
https://youtu.be/x32EyVrg8Jw Rainbow Six Siege Operator Guide:How To Play Ace in 2023? Ace is the 4th Hard breacher in the Rainbow Six Siege attacking roster.As a Hard breacher, he is capable…


Rainbow Six Siege Operator Guide: How To Play Fenrir in 2023?
Rainbow Six Siege Fenrir Guide:How To Play Fenrir in 2023 https://youtu.be/YoEWaQQHwIM Fenrir stands out as a formidable defender in Rainbow Six Siege, bringing a mix of intel-gathering and debuff abilities…