Rainbow Six Siege Operator Guide:
How To Play Blitz in 2023?
Playing Blitz, the Rainbow Six Siege operator, requires an aggressive and decisive approach.
His strength lies in excelling in 1vs1 encounters, where he can skillfully corner enemies and swiftly eliminate defenders at close range.
Blitz stands as a multifaceted attacker, demanding significant practice to harness his true potential effectively. Once mastered, he transforms into a formidable adversary, instilling fear in the hearts of his enemies.
PROS:
- Highly effective in close quarter combat
- The most offensive shield attacker in the game
- Blinds enemies within 4 meters
- Able to sprint with a shield
CONS:
- Lacks access to automatic guns
- Less defensive capability than Montagne – his limbs are always exposed
- Vulnerable to flanks & explosives
OPERATOR GUIDE – BLITZ
TABLE OF CONTENT

Blitz Utility Guide
What is the ability of Blitz?
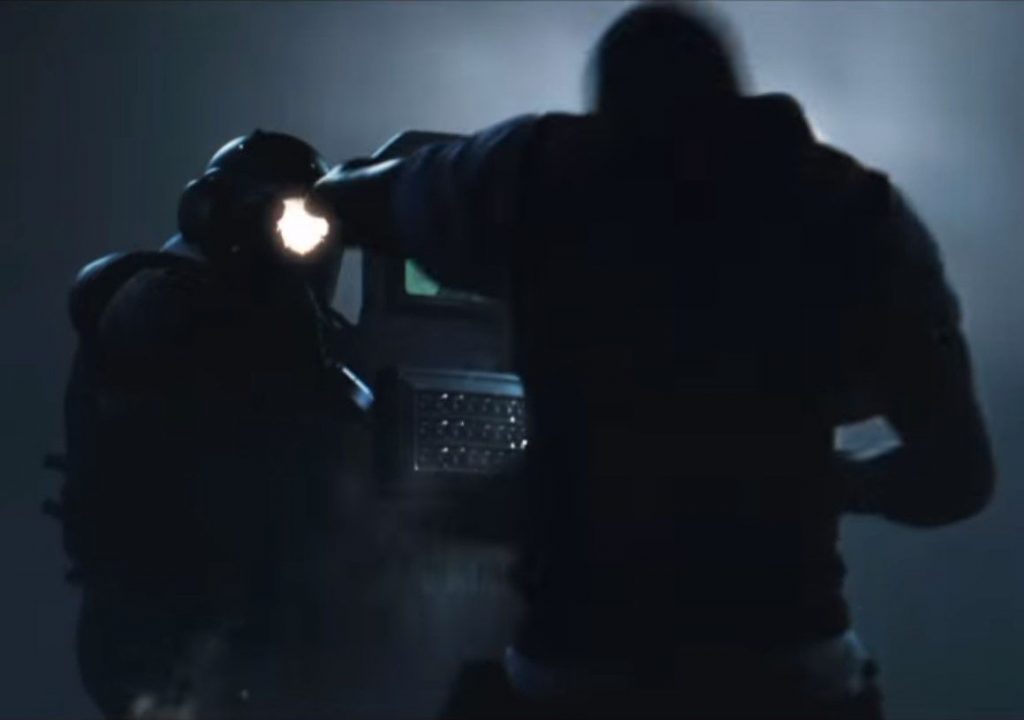
Blitz boasts intriguing utility centered around his versatile shield.
This defensive barrier completely transforms the operator’s playstyle, making him a unique force to reckon with.
In addition to its bullet-blocking capabilities, Blitz’s shield features a ballistic Flash mechanism, capable of blinding enemies within a 4 range effectively.
Rainbow Six Siege players can employ Blitz’s flash 4 times during a round, with a cooldown period of 7 seconds between each usage.
Defenders positioned within a 4-meter radius of the shield experience complete blindness for nearly 4 seconds.
An enticing characteristic of Blitz’s flash is that its blinding effect remains regardless of whether the defenders are facing him or turn away, setting it apart from traditional flashbangs.
How to use Blitz’s utility?
Using Blitz’s shield flash is a straightforward mechanic, simply requiring you to press the utility button. However, the true complexity lies in effectively utilizing the flash within a 4-meter range from the defender.
In this section, we will focus on tips for close-quarter combat to enhance your Blitz gameplay:
- Avoid Flash Hoarding
A common mistake is to save flashes for later. Remember, you have four flashes at your disposal, and using them strategically is key. If you find yourself within range, don’t hesitate to blind the enemy immediately. Holding onto flashes unnecessarily can deprive you of potential opportunities, especially if you meet an untimely demise or sustain early damage. - Combine Flash with Hip-Fire Tactics
Flashing the enemy is not the only way to secure an encounter. When you are within 6-7 meters of a defender, consider starting with hip-firing. Once you close the distance and are in the effective range, deploy the flash to catch opponents off guard. This tactical approach can give you a significant advantage in engagements. - Be Patient After Flashing
When an enemy is flashed, it’s essential to remain patient before aiming down sights (ADS). Many enemies will panic and blindly shoot, so if their crosshair was on you before the flash, they might still land hits. Wait for a brief moment to allow them to shoot in a different direction before closing in for the finishing blow. - Utilize Shield Sprint Ability
Blitz possesses a unique shield sprint ability in Rainbow Six Siege. By pressing the run button (default on PC: Shift), you can sprint with your shield raised. During this animation, you move faster than the default walking speed, and your hands are protected behind the shield, reducing the risk of getting hit. However, keep in mind that your legs remain vulnerable, so use this technique judiciously. - Shield as Additional Protection
When planting a breaching charge or bomb defuser, Blitz places his shield on his back. This shield serves as additional protection, blocking bullets shot at his back during the animation. To maximize your safety while planting the defuser, we recommend exposing your back to the enemy to minimize the risk of getting shot during the planting process.
By employing these tips and mastering the nuances of Blitz’s flash utility, you can become a formidable force on the battlefield. The following “How to Play” section will delve deeper into positioning and tactics to help you utilize Blitz’s abilities to their fullest potential. Stay vigilant and practice these strategies to dominate your opponents as Blitz!
Synergies with other operators:
Although Blitz doesn’t have a perfect match among operators, there are allies who can complement his playstyle and provide valuable support. Let’s take a look at them:
- Lion:
Lion’s gadget proves invaluable in immobilizing defenders, granting Blitz the perfect opportunity to close in on his targets without being impeded. - Dokkaebi:
With her logic bomb causing distractions and muffling defender hearing, Blitz can confidently push forward undetected, catching enemies off-guard. - Jackal:
Jackal’s expertise in tracking down roamers is a fantastic aid to Blitz, helping him locate sneaky defenders and eliminate them efficiently.
Apart from these tactical partnerships, Blitz can always team up with another entry fragger to capitalize on the chaos he creates or secure re-frag kills. Remember, effective coordination with teammates enhances Blitz’s potential, maximizing his impact on the battlefield.
Countered by Blitz:
In Rainbow Six Siege, Blitz is not a hard counter against any specific defensive operators.
Nevertheless, he excels at countering isolated defenders. His ability to swiftly close the distance and disorient opponents with his flash shield makes him a threat in one-on-one situations. Blitz’s presence often induces panic among defenders, leading to mistakes and vulnerability.
While lacking a direct counter-operator, his strength lies in exploiting isolated foes. Effective communication and teamwork amplify Blitz’s impact, making him a formidable force in dismantling lone defenders. In conclusion, Blitz’s unique and aggressive playstyle makes him a game-changing operator in Rainbow Six Siege.
Counters to Blitz:
While Blitz can be a formidable force, he does have some tough opponents to contend with. Let’s explore the defensive operators that give him a run for his money:
- Clash:
Clash’s electric zaps slow Blitz down and force his shield sideways, leaving him vulnerable to front shots. Tricky, isn’t it? - Warden:
Warden’s special glasses grant him resistance to Blitz’s flashes, making it challenging for our shield-wielding hero to blind him.
On top of these two counters to Blitz, he faces two common headaches on a regular basis:
- Crossfires:
Crossfires occur when multiple defenders position themselves in opposite directions, covering various angles on Blitz. This means someone is likely to have a shot at his back or side. - Explosives:
Whether it’s C4 or impact grenades, both explosives pose a significant threat to Blitz since he’s not very resistant to their damage. Impact grenades are especially nasty as they can force his shield sideways, leaving him vulnerable to shots from the front.

Blitz Playstyle Guide
Playstyle role of Blitz
ENTRY FRAGGER: The Blitzkrieg Train is On
Now that we’ve covered the essentials, let’s delve into the tactics to play Blitz effectively.
With a focus on speed, precision, and aggression, Blitz excels at taking control of the map and dealing with isolated defenders.
Whether you’re playing solo or with a squad, having a teammate by your side is always beneficial. Teaming up with a fellow operator armed with an automatic gun can greatly enhance Blitz’s capabilities. Share your plan with your teammate and create a Blitzkrieg duo to dominate the opposition.
Plan your route to the objective strategically, considering the right spawn point and anticipating aggressive defenders while on Blitz.
Once the action phase starts, begin by droning your entry point to avoid surprises. Push forward decisively, checking corners, and keeping an eye out for potential Kapkan traps. When you spot an enemy, close the gap swiftly, using alternatively sprinting and crouching to disorient them. If they possess explosives like C4 or Impact grenades, attempt to bait them out before making your move. Flash your target at the right moment, observing their reaction, and choose your next move accordingly, either going for ADS shots or a melee knockdown.
To manage potential crossfires from defenders, utilize smoke grenades to isolate enemies, giving you a tactical advantage.
While playing Blitz, be mindful of your surroundings and avoid areas where enemies may have elevation advantage, such as stairs. Such positions make Blitz vulnerable to headshots from above, jeopardizing his safety.
Furthermore, bear in mind that different maps present unique challenges for Blitz. Some maps, like Villa, offer a favorable playground with limited angles and fewer wide open spaces, while others, like Clubhouse, pose difficulties due to wide and exposed areas.
The key to Blitz’s effectiveness lies in instilling panic in the enemy’s minds. When charging at them, enemies may make mistakes, forget about their explosives, or act hastily. Capitalize on these moments of panic and strike while the iron is hot. However, be aware that the higher you climb in ranks, the calmer and more strategic enemies become, which can reduce Blitz’s efficiency.
Difficulty of Blitz – HARD
While some Rainbow Six Siege players may perceive Blitz as an easy and overpowered operator, the reality is quite different. Effectively utilizing Blitz requires advanced skills and a strategic mindset, especially for shield operators in general.
Blitz excels in specific scenarios where he can avoid being flanked and isolate defenders. However, facing multiple defenders from different angles can quickly turn him into easy prey for coordinated opponents. Knowing how to approach enemies and choosing the right fights are crucial skills to master as the German shield attacker.
The key to unlocking Blitz’s full potential lies in cooperation and teamwork. He thrives when his teammates provide support and cover his flanks. This synergy is especially vital in pre-made squads, where coordinated efforts can elevate Blitz’s impact on the battlefield significantly.
Despite the perception of Blitz being a straightforward operator, those who truly understand his capabilities recognize the need for finesse and tactical prowess. By honing these skills and embracing a collaborative approach, players can unleash Blitz’s true power, turning him into a formidable force in any match
Blitz Loadout Guide
Available loadout for Blitz
| Primary Weapons | – | – | – |
| Secondary Weapons | P12 | – | – |
| Universal Gadgets | Hard Breach Charge | Smoke Grenades | – |
suggested loadout for Blitz
| Primary Weapon | Barrel | Grip | Sight |
|---|---|---|---|
| – | – | – | – |
| Secondary Weapon | Barrel | Grip | Sight |
|---|---|---|---|
| P-12 | Muzzle Brake | – | – |
| Universal Gadget |
|---|
| Smoke Grenades |
Why such loadout for Blitz?
Primary Weapons:
Shield operators like Blitz, Montagne or Clash do not have possibility to equip a primary weapon.
Secondary Weapon:
Blitz’s loadout offers limited variation, with only one weapon available – the P12 pistol. Despite having just one option, the P12 proves to be a reliable choice, boasting low recoil and a generous magazine size, allowing you to fire in ADS without worrying about running out of ammunition quickly.
For attachments, I highly recommend using the Muzzle Brake. The Suppressor is not useful for Blitz since it will give away your position with loud gunfire, alerting the defenders. The Muzzle Brake significantly reduces recoil on the P12, a valuable advantage considering it’s the only firearm at your disposal.
Additionally, equipping a laser sight when playing any shield operator, including Blitz, is a smart move. The laser enhances the gun’s hipfire accuracy, which can come in handy when you’re not close enough for a melee attack and want to avoid exposing your head to defenders.
Secondary Gadget:
As for universal gadgets, opt for smoke grenades. These can prove immensely helpful in limiting the angles you’re exposed to and dealing with crossfires. By deploying smoke grenades strategically, you can obscure one of the angles, providing a tactical advantage. Moreover, smoke grenades can be vital when attempting to plant the defuser if you manage to stay alive with Blitz until that crucial moment.
Mastering Blitz’s loadout and gadgets is essential to making the most of his abilities on the battlefield. By choosing the right attachments and universal gadgets, you can enhance Blitz’s effectiveness and contribute significantly to your team’s success.
More Content:
Rainbow Six Siege Operator Guide: How To Play Ace in 2023?
https://youtu.be/x32EyVrg8Jw Rainbow Six Siege Operator Guide:How To Play Ace in 2023? Ace is the 4th Hard breacher in the Rainbow Six Siege attacking roster.As a Hard breacher, he is capable…