R6 Siege
Beginner Guides:
Defensive Basics
Learn the basics of setting up a defense in Rainbow Six Siege!
Introduction
Defensive Basics
Table of Content
Operators setup
- roamers – 1-2
- anchors – 3-4

Goals on Defense

Anchors, on the other hand, usually play more passively on objective, waiting for attackers push on the site.
Often, when prioritizing kills, we can get a little bit too greedy and die early in the round.
Early deaths can be detrimental to the team’s success and are definitely not ideal from our goal perspective.
Should you be passive instead? No, that’s not what I am recommending here. What I advocate for is a paradigm shift of mindset and priorities as a defender in Rainbow Six Siege.
Mindset: Instead of flashy late-round flank, force attackers to come for you before going for the objective.
Priorities: Instead of going for a risky peek as an anchor, focus on delaying the final objective push by holding an advantageous angle.
Reinforcements
- Hard Breachers
or - Hard Breach charge – a new universal gadget
Thus, reinforcements significantly limit offensive options for opening new angles and traversable holes.

Instead, the limit is imposed on the team reinforcements – 10.
Wall(s) leading to exteriors
In most cases, such walls are the most essential part of reinforcements.External walls are the primary focus of attackers for breaching as they give the most significant advantage over defenders.
- Hatches above objective
If your team is going to anchor from the objective room, then reinforcing the hatch above it is a crucial aspect. Vertical control is an essential aspect of winning in Rainbow Six Siege.
An exception to reinforcing such hatch is when your team intends to hold objective from above – a more advanced way of setting up a defense, not a recommended tactic for inexperienced teams.
- Remaining objective walls
Some sites, especially when playing bomb mode, have more soft walls (can be reinforced) than defenders can reinforce. Once the first 2 priorities are secured, use available reinforcements on remaining objective walls. Focus on locations close to building entrances or areas you are not intending to cover!
If playing bomb, do not reinforce between objectives
This is rather a not-to-do tip, but extremely important as reinforcing between bombs is the most common mistake new players do.
It is counter-intuitive, I get it, but you will lose rounds because of that.Such reinforcement placement will result in limiting defenders’ ability to retake bombsite once attackers have any sort of control over it. Attackers can simply watch 1-2 entrances and wait for defenders to get into their line of sight.
Positioning
Roamer's positioning
Anchor's positioning
- To how many angles am I exposed?
The lower the number of angles you have to watch, the better.
- Can I change the position if pushed?
Getting stuck in a location with a single exit that can be easily cut off by attackers is not the best position for an anchor in Rainbow Six Siege.
- Do you have access to the remaining entry points of the objective?
Most objectives have 2+ entry points, from which attackers can push it. Consider your potential to react quickly if attackers push direction not covered by you
- Which spot is covered by my teammates?
In most cases, covering different angles by defenders is a better idea than having multiple defenders watching the same entry point.
An exception, of course, being situations when you know where the remaining attackers are pushing from.
Carrier denial exception
Call it out!
Let your teammates know that you’ve got a defuser so that they can adjust accordingly. Such should be done with verbal info, as well as ping or location info on defuser- Set yourself up with a line of sight on the defuser
Do not stand on the defuser, but put yourself in a spot where attackers will not see you easily, while you can keep an eye on the defuser
Just try to bear in mind that some locations of defuser being dropped are not worth shifting the entire strategy towards it!
Universal Utility
Primary defensive utility
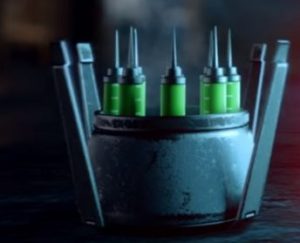
- Nitro Cell – 1-2The best counter to shield attackers or to prevent the defuser plant.Hold on to C4s until you can throw them at attackers.Not beneficial to be pre-placed, unless vertically for C4 from below.

- Barbed wire – 2-3
Wires should be placed in locations where they can impact attackers mostly and reliably, such as:
- objective entrances
- choke points, such as narrow corridors or stairways

- Impact grenades – 1-2Impacts are mainly useful for:
- creating rotation holes on the objective for bomb mode
- roamers who can utilize them to create new avenues or escape routes.
Additionally, impact grenades can be used to:- finish downed enemies when a clear line of sight is unavailable
- kill damaged shield operators

Secondary defensive utility
- Deployable Shield – 0-1A hip-high shield that is deployable on flat surfaces. It can be used to protect from gunfire & explosives, as well as an obstacle for attackers to cross locations.Best to use the shield for:
- create hard to deal with angle – when placed close to the doors or other obstacle, shields can provide with a lot of cover and a possibility to quick peek attackers
- the obstacle at the entrance – shields can be used to force the attacker into vaulting over a doorway.
Such placement combines very well with Frost as she can place a trap right behind a shield.

- Proximity Alarm – 0-1A deployable alarm device that emits a sound when attackers are within its line of sight and range.
Great tool for covering your back to prevent a sneaky flank from attackers.
Additionally, Proximity alarm frees up resources and mental space to focus on specific angles and locations

Bulletproof camera – 0-1
Best placed on walls that allow the camera to give either:- a long line of sight
- important information, such as objective entrances
However, try to place them in locations that are not easily accessible to attackers.

Unique Utility
TRAPS
Objective entrances.
This is the most common place where defenders set their utility, and it is for a reason.
Why?
- The highest chance for attackers to trigger a trap
- Chokepoints
- Even when spotted, gives an advantage
- Effective versus early rushes and late pushes
- Predictable
More careful and experienced opponents will try to ensure the objective entrance is cleared from any defensive utility before pushing it (by i.e., shooting Ash breaching round).
- Exposure of the trap to be spotted
In many cases, attackers will spend a significant amount of time starring at the objective entrance before crossing it. As a result, traps are more likely to be spotted.
- The area you intend to play.
Such placement can give you an advantage as your own traps will provide you with:
- intel
- advantage in gunfight
- flank prevention
Breach Denial

- Walls leading to an exterior area
- Hatches above objective (Kaid)
- Other reinforced objective walls.
Usually, walls close to building entrances are strong positions for attackers, as well as areas left unattended by the defensive team.
ANTI-INTEL

- Objective entrances.
- Stairways.
- Other doorways & drone holes.
INTEL GATHERING
- What intel will I gain?
Think about the type of intel you can get from such placement. Black Eye placed in objective will give you information about attackers’ push and defuser plant.
On the other hand, the camera placed farther from objective, but in the commonly utilized area can give you information about the direction of attack and possibilities for flanks and aggressive runouts.
- How hard is it to counter?
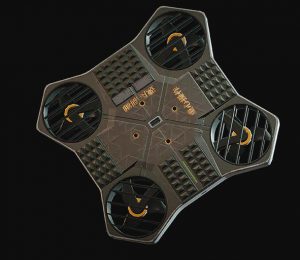
Placing Yokai drone in a location where attackers will spend a significant portion of time during the round can give the most intel, but can be the easiest one to counter.
- How much area will it cover?
Consider the number of angles and size of the area that your utility will cover.
Valkyrie’s camera placed outside of the building, covering multiple approach directions from attackers can be extremely beneficial.
- How hard will my utility be to spot?
You want to conceal your intel-gathering tools as much as possible. Black Eye camera placed in an area with tons of environmental elements will be significantly harder to spot than one set in the middle of an empty bright room.
ADS

- Anchoring position.
- Objective entrances.