Introduction
Do you tend to die while entering objective building?Not feeling confident pushing the site?Having nagging feeling of not knowing when and from where roamers may hit you?
However, the economy in Siege differs as it comes from the number of drones available for attackers.
Preparation phase droning
GOAL
The fundamental goal for droning as an attacker during the preparation round is to find an objective location.

Do not mistake the above goal with “place all drones in the objective room.”
Many players repeatedly make a mistake of prioritizing marking objective and all enemies.
Of course, it is not a bad idea to identify objective or have enemies marked revealing operators selected on the defensive side.
Such information may come very handy during the later stages of the round.
Situations where identifying objective and operators give advantage to attacking team:
- operators revealed
Knowing which operators are left alive by just looking at icons on top of the screen can be helpful when judging the situation.
Example:
You know Doc and Mira were the only defenders on the site. Based on defending operator icons, you see that Mira and Doc are killed, so you can make quick callout that objective is clear and push the objective.What is likely to happen?
Pushing site without any anchors will force roamers to rotate back on your terms, giving attackers an edge and eliminating the element of surprise.What would happen otherwise?
You would depend on other factors, such as teammates calling out which defender they killed or droning the site to check the situation. As a result giving roamers time to rotate back to the site, therefore eliminating the possibility to complete the objective. - objective located
To identify objective attacker or drone need to have a clear line of sight on the objective.
Locating objective is essential, especially to new players who do not know maps by heart.There is also a secondary more situational aspect – defenders are notified by audio communication from the caster that attackers found the objective.
It sounds like not a big deal, right? Well, most of the time, it is not.
There are, however, situations in which a player tries to clutch the round by sneaking up on the objective. Such an audio cue may reveal their position easily.Example:
1vs1 bomb.
The last defender is in A, and the attacker tries to sneak on B to plant defuser without being challenged. The attacking team did not identify bomb B. As soon as the attacker has eyesight on the bomb or drones that objective, the defender is notified about attackers locating objective B. This information gives defender heads up to pay more attention to B.
Nonetheless, the above benefits are not worth losing drones in the process.
Prioritize keeping your drone alive during the preparation phase.
How you drone during the preparation phase will depend on whether you are in a pre-made team or solo queueing.
Prep phase - Solo Queue
Decide on the entry point as soon as objective is revealed and move your drone close to the entrance you intend to use.
You can leave drone inside the building or just outside of it.

Reasoning
Tip for new players
If unsure where your starting point will be, check the map (“7” on a keyboard or right on a D-Pad) to see which side of the map your spawn is. As a result, you can use a compass on the bottom of your screen to determine where to move drone on the map.
Example:
Oregon – you choose to spawn in “Junkyard.”
Leave your drone on the South-West side of the map.
If unsure about the location of drone once the action phase begins, jump on a drone to see yourself through “drone eyes.”
Prep phase - in a team
Preparation phase drone usage might be quite different if you are playing with the pre-made squad.
There is no need for five drones being placed at an entry point, even if your team starts in the same location.
Therefore, as soon as the objective location is revealed have a quick chat about the main focus for the round, then pre-place drones to help the team with agreed focus.

Plan for the attack: First, Take control of the top floor first to gain vertical control and force defenders from their spots.
- South-East stairs;
- CCTV room;
- West balcony – outside of armory;
- Offices.
Action phase droning
The start of the action phase does not mean the end of drones utilization. In fact, that is the time when you will utilize them the most!
In this section, we will cover four essential functions droning fulfills in the action phase.
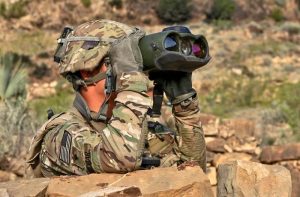
Scouting
- enemy location
- utility placement
- defensive setup and ambushes
- corners
- hatches
Whether they are open. Usually means either roamer trying to either shoot careless attackers on entry or pre-made for late-round flank. - kill holes in walls or ceilings
Scouting can be separated into two main categories: Scouting for yourself or teammate.
Scouting for yourself
However, I understand that counting on teammates is not always a viable option.
- Use the preparation phase drone to scout
The primary objective of the action phase beginning is to ensure reaching the objective building and entering it safely.
I suggest having a glance over any pre-placed drones right at the start of the round. You may spot spawn peek attempt or avoid it (defenders will usually wait only a few seconds with spawn peek attempt).
Once you reach objective building use drone to check entry point room and adjacent location for any roamer who tries to sneak up on you. - Do not scout the entire map at once
I’ve seen many players who spend a significant amount of time scouting the whole route before even entering the building.
If you try to gather intel for your teammates who clear areas with your drone, then that’s excellent droning.
However, scouting for yourself whole map makes no sense. By the time you reach a distant point of the map, the situation at your side of the map might have changed entirely.
The more time between intel gathered and intel used lessens intel reliability. - Drone from a safe spot
Using drone leaves attacker vulnerable, thus choosing a location where you are unlikely to be spotted is crucial.
If droning from outside, place yourself behind obstacles and in a place where defenders cannot easily run out on you.
When droning inside the building, place yourself in concealed spots, preferably in a room without possibility to be flanked from behind. - Don’t leave drones far behind
You only have two drones, so make sure you’re not leaving them in completely useless spots.
Having drone left at the entry point for the entire round is not going to be useful during the objective push. Instead, pick drones up as you progress clearing map to make sure you can utilize them later in the round.
Scouting in squad
Bear in mind that most tips from scouting solo apply to scouting in a squad.
The main difference between scouting for yourself and teammates will be the way you utilize information.
When scouting for yourself, the defender has time to react and prepare during the inevitable time slot between intel gathered and action is taken.
As a result, the most efficient technique of scouting with Rainbow Six Siege drone is to pair with a teammate.
By pairing, I mean having attacker (preferably fragger like Ash) entering building and clearing rooms by following the drone. The drone is operated by another attacker – ideally supporting operator – who reveals information to the fragger.
A defender who has been droned out will likely try reposition or retreat. Therefore, it is crucial to follow up intel gathered by drone with immediate action from a teammate ready to challenge defender.
Getting droning with a teammate appropriately done will take some time to get a good hang of it.
Timing actions properly will require synergy between players. As a result, the described technique is best suited for playing with a pre-made squad or at least one teammate you know.
Please note that utilizing the above method is also possible when queuing solo. However, it is less efficient and depends heavily on your luck when it comes to matchmaking.
One of the essential tips that we can give in regards to scouting is: don’t mark (spot) enemies with Rainbow Six Siege drone!
By doing so, attackers give defender heads up about incoming ambush.
Utilize the situation by either giving a callout to teammates or acting upon intel yourself!
The best situation in which you can mark the enemy is to help a teammate with the wallbang enemy.
(Wallbanging – Rainbow Six Siege has plenty of destructible surfaces, which can be shot through to kill an enemy)
Another way to utilize spotting is….

Distraction
In case further distraction is needed, drones can spot defenders.
Flank Watch
A flank watch is another vital role which can be handled by utilizing Rainbow Six Siege drone properly.
Setting up extra drones at locations where defenders are likely to flank from can be detrimental to attacking team success.
Instead of leaving somebody to watch your flank, you can periodically check the situation by yourself, or preferably ask a dead teammate to watch your drone. Fallen allies can be still useful to the team in Rainbow Six Siege!
Defuser Watch
Post plant situation is often about wasting defenders’ time. Waiting for defenders to push is often a more reasonable idea than taking head-on gunfights.
You want to minimize the risk of dying and force defenders to take risks. Drones give you safety net as remaining attackers can break a line of sight on defuser and back out to safety.
DOS & DON'Ts
DO
- Maximize potential intelIdeally, you want to position your drone in place that gives you the most information (a wide and long line of sight) while being hard to spot.In other words: try to maximize intel from the drone while minimizing the risk of it being seen by defenders.
Intel in Rainbow Six Siege, when combined with communication, is one of the most important aspects of victorious rounds
- Leave drones in hard to see places
Do not leave drone in the middle of the room or right at the doorway.
Try to conceal drones location by placing it under furniture like a bed or cupboard.

- pre-place drones
Anticipate where you will need a drone.
Taking out a drone and moving it makes a sound. Hoping on a drone that is already in the position to provide you with intel is much less evident, and likely won’t alert nearby defenders.
DON'T
- Drone to the objective room during the preparation phaseThis is one of the biggest mistakes players commit. Do not go directly to the objective room with your drone. During this phase, defenders pay significantly more attention to drones than during the action phase.
This is especially valid if the objective was already located!
- Face check rooms without droning
Do you still have drones left and unsure about the enemy’s presence or exact location in a specific area? Drone the damn room. In Rainbow Six Siege drone is your “extra life.” - Spot enemies
Unless you want to distract the enemy or help teammate with a wallbang.
Summary
- Save your preparation phase drone
- Place prep phase drone at the entry point
- In Rainbow Six Siege drone is your extra life!
- Scout ahead during action phase – either for yourself or (preferably) for a teammate
- Hide your drones
- Drone location properly before calling it out as “Clear”
- Act on intel gathered
- Do not drone too much ahead without follow up
- Don’t spot enemies, unless distracting for an easy kill or to wallbang
- Spend some drones on watching the potential flank
- Place drone with a line of sight on planted defuser
